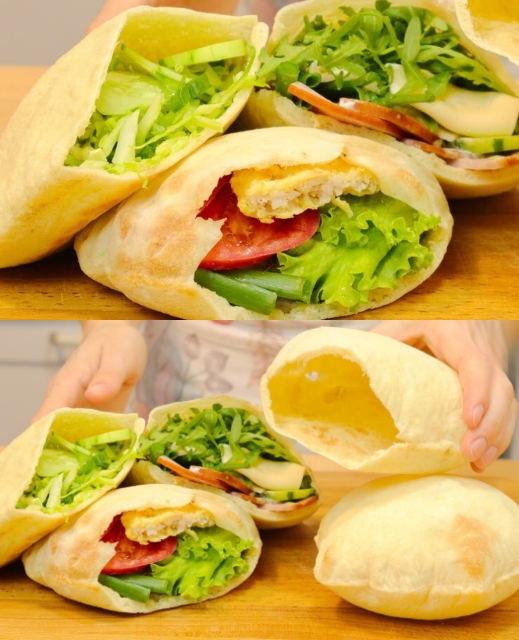
There’s something undeniably satisfying about creating your own bread at home, and these Homemade Pita Pockets are no exception. The magic moment when they puff up in the oven is a clear sign of success, ready to be filled with an array of delicious, colorful fillings. This recipe not only offers the pleasure of baking from scratch but also the versatility to customize your meal. Whether you lean towards the classics, like grilled meat and veggies, or prefer a modern twist with unconventional fillings, these pitas are the perfect base for your culinary experiments.
The process, from mixing the dough to pulling the golden, puffed pitas out of the oven, is a journey of creation that anyone can embark on. The end result is a soft, yet slightly crispy pita pocket, ready to cradle a mix of textures and flavors. Imagine slicing open a warm pita and stuffing it with your favorite fillings – the possibilities are endless. This dish is more than just food; it’s an experience, a blank canvas for your creativity, a delicious project that culminates in a feast not just for the stomach, but for the soul.
Full Recipe:
Ingredients:
Dough:
- 400 gr. flour
- 6 gr. pressed yeast (or 2 grams dry)
- 20 gr. sugar
- 7 gr. salt
- 20 gr. vegetable oil
- 220 ml. water
Filling (Suggestions):
- Mixed vegetables (lettuce, tomato, cucumber)
- Fresh herbs (parsley, mint)
- Grilled chicken or beef strips
- Shredded cheese
- Your choice of sauce or mayonnaise
Directions:
- In a mixing bowl, combine the water, yeast, sugar, salt, and vegetable oil. Gradually add the flour, kneading for 5-10 minutes until smooth and elastic.
- Allow the dough to ferment for 1 hour, folding it twice every 20 minutes.
- Divide the dough into 10 pieces (66 grams each). Round each piece and place them in an oiled container. Refrigerate overnight.
- Preheat the oven to 482°F (250°C) with a baking sheet or stone. Roll out dough pieces to 3-4 mm thick.
- Bake in batches of 3 for 3-4 minutes, or until puffed and golden.
- Once baked, fold the pita in a container with a lid to keep soft. Pitas can be frozen for later use.
- Slice and fill with your preferred ingredients.
Prep Time: 1 hour 20 minutes (plus overnight rest) | Cooking Time: 4 minutes per batch | Total Time: 1 hour 30 minutes plus resting time | Servings: 10


